Wiring the Bits. And the Bytes

Since the last post (what, two weeks? Three?), most of my van-related activity has been in pursuit of the electrical system. I figured out a significant portion of it (ahem, the vehicle alternators will charge the house batteries, not through a DC-DC battery-to-battery charger, but rather using a DC-AC-DC system with an additional inverter. Aren’t you glad you asked?), and that decision let many other details fall into place. But the niftiest advance involves the inclusion of computer technology in the van.

I’m a software developer; you were expecting fine woodwork?

In all likelihood, you’ve heard the term “Arduino” bandied about. You might even have an idea what they are. If not, fret not. Arduino is the specification for a family of processor chips. The word also refers to the chips themselves, the concrete manifestations of that standard. Other examples of processor families are the Intel chips found in most PCs, the Apple M-series chips now appearing in new Macintoshes, or the ARM chips powering most cell phones.

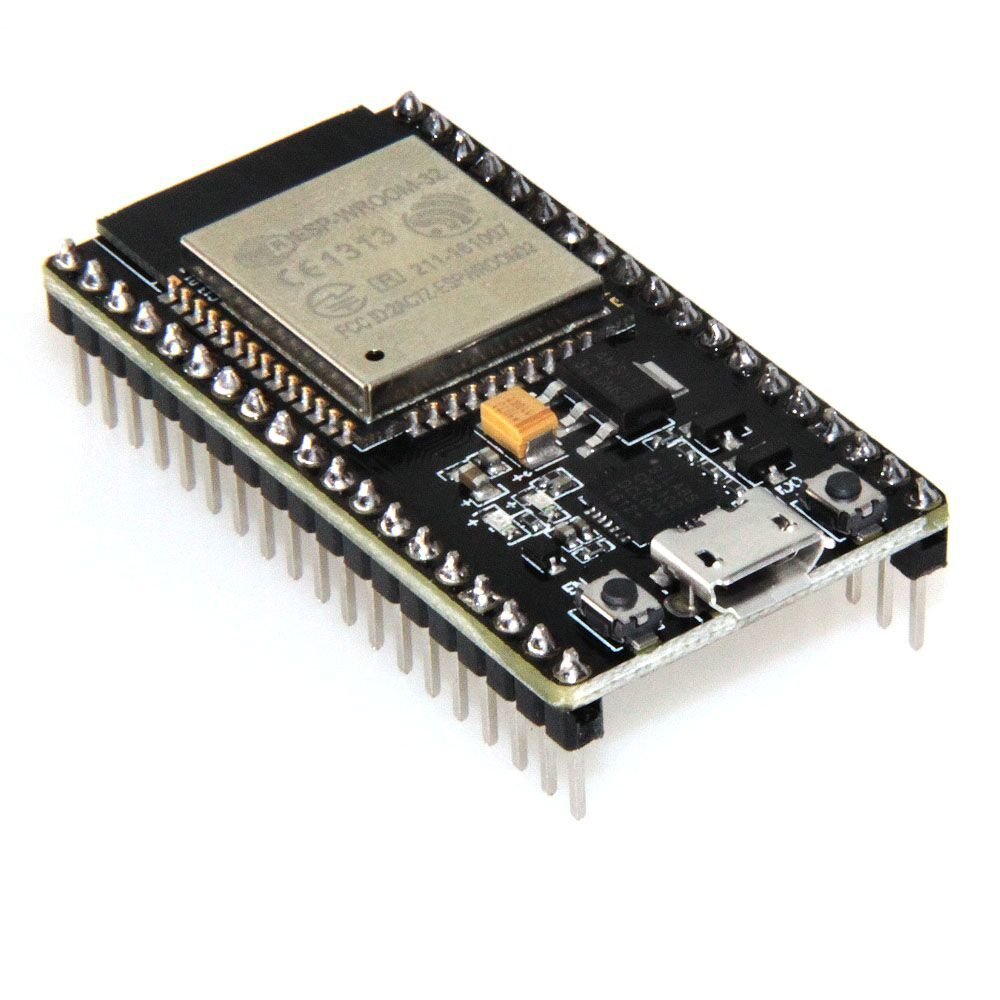
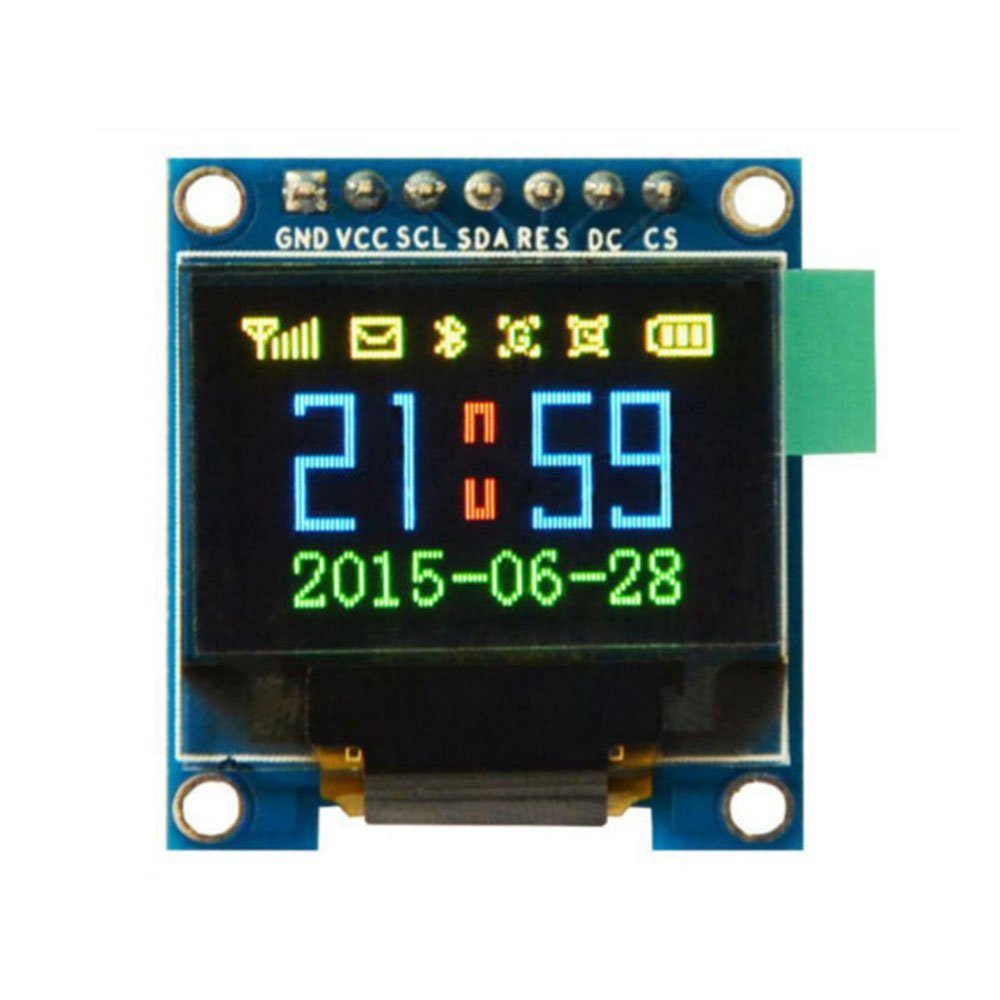
One particular configuration of an Arduino chip is the ESP32 board. This is a little circuit board, about 1” x 2”, with an Arduino processor, some memory, a few other chips, and a bunch of pins to which to connect wires. Besides these wired connections (using any of several industry-standard protocols), the boards support WiFi and two flavors of Bluetooth, regular and low-power. They can take inputs from a wide variety of sensors and detectors (temperature, humidity, movement, light, and so on), and drive outputs like relays, little-bitty screens, and speakers. And they cost around $10 apiece.

ESP32 Card

My first thought about using ESP32 boards was the flexibility they offer. In the van, there are going to be lights and fans and other devices to control, as well as switches and buttons to control them. And a whole bunch of wires crisscrossing the van to connect the controllers with the controlled. So what happens when, two months down the road, we decide that it would be much more convenient to have the switch that controls the galley lighting right here instead of over there? Or two switches, one here and one there. If everything is hard-wired together, making those changes would involve tearing out a lot of stuff and redoing it.

On the other hand, if all of the switches and buttons were just connected to a central computer, which was also connected—through relays and other electronics—to all the lights and fans and such, we could change the behavior of any switch with a simple programming change: five minutes work. With this in mind, I started my research.

Itty-Bitty Screen

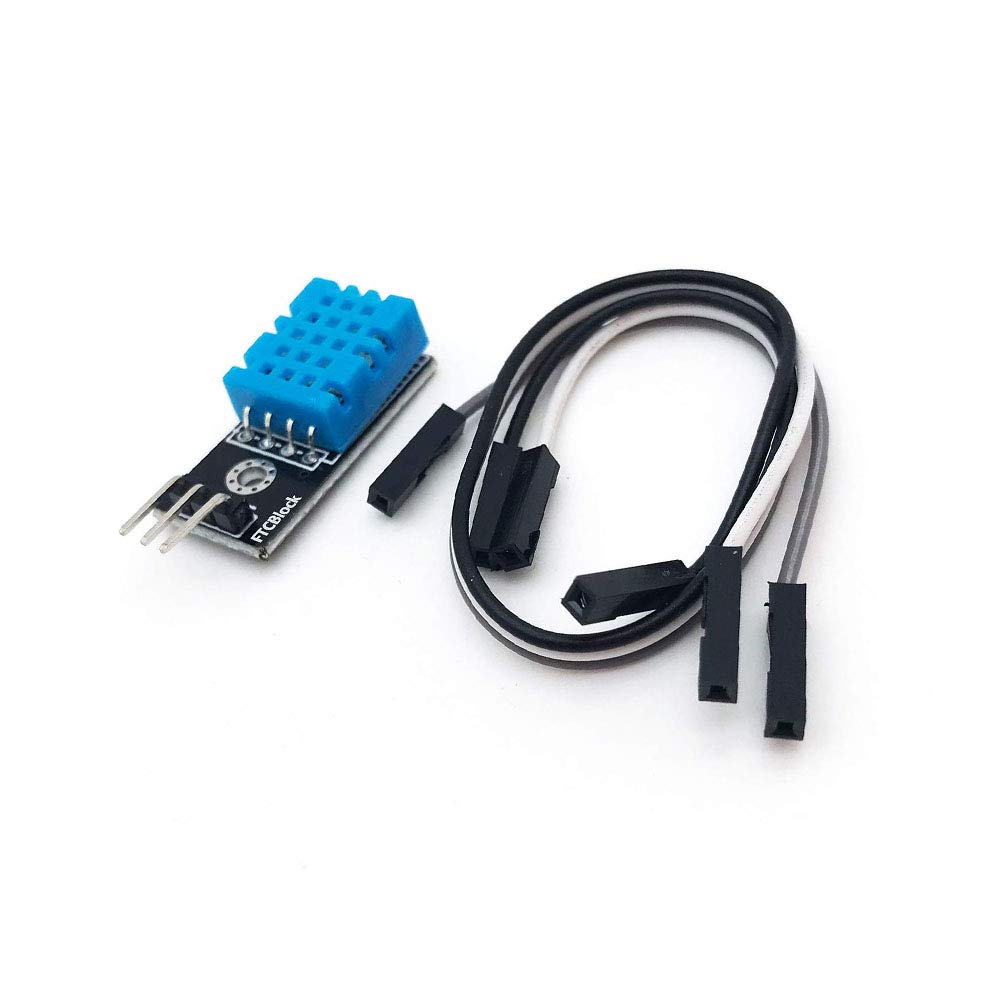
Since then, a few more applications have suggested themselves. The house batteries are of a variety (LiFePO4) that should not be charged when cold. They work just fine in the cold, powering all the appliances and devices, but trying to recharge them when they’re near freezing can damage them considerably. What if we had a little stand-alone computer, hooked up to temperature sensors and controlling a little heating pad under the batteries? That would keep them from getting too cold to charge.

Temperature Sensor and Cable

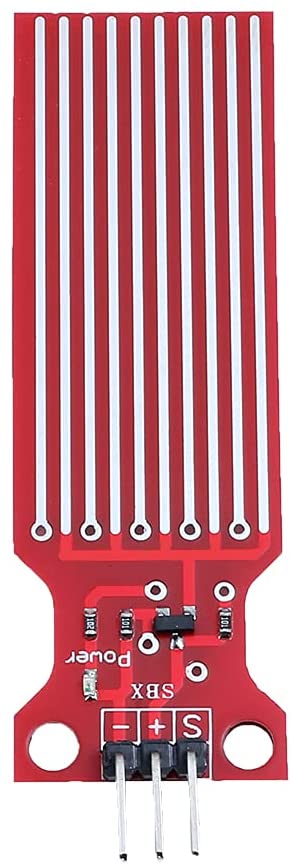
Another application would be level detectors for the fresh-water supply and grey-water output tank. With a couple of these, we could always know how much water was left to drink, and how close we are to needing to empty the grey-water tank.

Water-Level Sensor

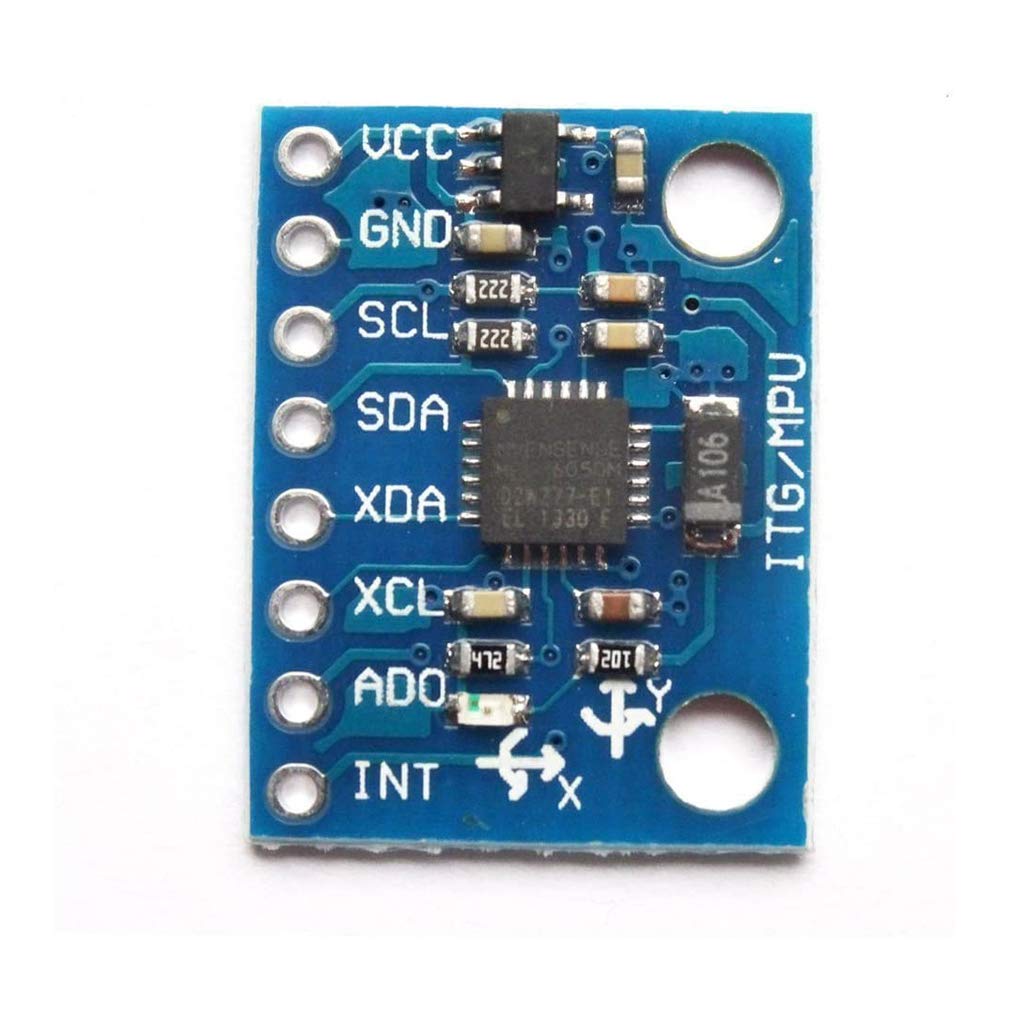
Y’know how a smart phone knows which way it’s pointed, and which direction it’s moving, and how fast? There’s a device inside, a gyroscope/accelerometer, which supplies all that information. It’s tiny. You can get them on Amazon, three for $10. They’re so small, they had to stick them on 1” x 1” cards, just to be big enough to attach the appropriate wires. The ESP32 card can talk to those, as well. I’m still trying to figure out a good application for an accelerometer, but I know there’s one out there. Probably won’t need an alarm to tell us the van is tipping over, but we should be able to think of something.

Gyroscope / Accelerometer

Posted in Gear, Preparation, Research | 1 Comment

Mavi Has The Floor

For the past few weeks (months? Oy), most of my van attention (when not doing general reading and research) has been on the floor. Yeah, some of it has been on the roof rack, which I discovered really should have been put together with stainless steel bolts and nuts. Turns out, rain can get the rack and its hardware all wet. Then the hardware might rust, if you can imagine that. So I’ll need to order new hardware and spend a few hours replacing it all. Whee!

Floor, yes, the floor. From the factory, the van’s floor is fairly thick sheet metal. And it’s filled with many small peaks and valleys, poking above or below the main floor height by about a half-inch. This makes the floor much stronger and less likely to bow than if it were flat. We build our camper’s floor (quite flat) on top of it. From the postings on the forums, it seems most builders like to fill all these valleys with insulation, both thermal and acoustic. Others like to leave them unfilled, to provide some air circulation.

On top of that, some people like to put a thin layer of closed-cell foam, like Minicell, as a moisture barrier and for more acoustic deadening.

Over that layer comes (usually) the main layer of insulation, either:
• XPS (expanded polystyrene, aka Styrofoam),
• XPI (expanded poly-isocyanurate, somewhat higher-tech Styrofoam),
• wool batting (really),
• Thinsulate (same as in gloves and jackets, just thicker),
• or nothing at all (in temperate climes, not much heat is gained or lost through the floor)

The next layer is usually a sub-floor of half-inch plywood, most often Baltic birch or marine-grade. And finally, the layer that people will actually stand on. This can be just about any flooring material one would use in a home or office. There’s much leeway since it probably doesn’t extend under the cabinetry or bed or shower or anyplace else that people don’t walk. This means that very little is needed, so if it’s heavy material, not a such a big deal.

From the possibilities to the actuals: I’ve decided to let the van breathe, and leave the valleys open. I may go in later and put a layer of acoustic insulation in them, but it won’t fill the valleys, just coat their bottoms. That’s step one.

We’re skipping the Minicell layer. Seems to me like all of its functions can be handled by the other layers.

For the main layer of insulation, we’re going with 1.5 inches of Thermax. This is an XPI, with a little fiberglass mixed in, and coated on both sides with aluminum foil. From what I’ve read, it has the best thermal properties, and is fairly easy to work with. The biggest problem is that it’s not a consumer item, and is rather difficult to track down. After several weeks of searching, I found a lumber yard in Ypsilanti that was able to order it specially.

For the sub-floor, I decided on half-inch Okoume plywood. This is very high-quality, marine-grade plywood. The closest place to get it is Charlotte, Michigan. It’s really pretty, which is not an adjective very often applied to plywood.

In order for the sub-floor to fit properly, the underlying insulation really should be in place first, as the profile of the sheet metal floor is slightly different from the profile of 1.5 inches above it. So before I knew just how I’d acquire the Thermax, I decided to make a trial run out of cheap XPS sheets ($15 at Lowe’s). I just won’t permanently affix it, as I will the final insulation, and then I’ll be able to replace the XPS with the Thermax I eventually find. As a bonus, I’ll be able to use the XPS pieces as a template when cutting the Thermax to fit the van.

The incisive amongst you may now be wondering how I cut the XPS in the first place: what did I use for a template then? Good question. Cardboard! To make a template, I first took a bunch of opened-and-flattened cardboard boxes, and cut and arranged and taped the pieces to cover the floor more or less precisely. Then I took up that template, and transferred its shape to new 4’x8’ sheets of pristine cardboard, to make a template I could move around and would not catch and fall apart on all the tape and seams. Then I used that new template to cut out the XPS insulation.

But before I could cut out the plywood sub-flooring, I got a line on the Thermax I’d wanted. So I used the XPS as a stiffer, easier-to-handle template, and used it to cut out both the Thermax and the plywood. Then I covered the plywood—front, back, and edges—with several coats of Polycrylic, to seal it against moisture, so it won’t warp or rot. And here we are.

Right now, the Thermax and plywood are just lying on the floor. It’s a pretty good fit, so they won’t move much, but there are a few more structural additions I’ll make before affixing it all securely (permanently!) to the van’s sheet metal. This has to wait until more of the design is finalized. I’ll discuss their motivations and ramifications then.

The new sub-floor, viewed through the rear doors
The new sub-floor, viewed through the slider door

Posted in Gear, Preparation, Research | 1 Comment

The Name of the Van

Since I have another post lined up and ready, but have been waiting for other parties first to explain How We Named Our Van, and then finding no such explanations forthcoming, I have taken it upon myself to offer one such now. As it describes people and events some fifteen years past, I cannot guarantee its complete accuracy, but hey, it’s all you’ve got.

We actually spent a fair amount of time trying to name the van. We wanted it to be clever and meaningful and maybe a pun or at least a twist of words. Many candidates had a nautical theme, a few referenced whales, or combinations of our names, or the fact that the van is big and blue and has wheels and we’ll live in it, and so on. Nothing quite clicked.

When Joe was what, five, and losing his primary teeth, he of course put them under the pillow for the tooth fairy. That turned out to be a good deal for him, and he was quite taken with the whole process. One of the transactions involved a two-dollar bill, and Joe was so excited about this that he wrote a thank-you note and left it under his pillow the next night. The Tooth Fairy had to reply. A steady correspondence between Joe and the Tooth Fairy, aka Elizabeth, ensued.

I’m not sure if he asked, or she volunteered, but the topic of her name came up. She told him it was Mavi, the Turkish word for blue. Years ago, Elizabeth taught English in Turkey, and has a high regard for the country. Joe and Mavi continued to pass notes for quite a while.

The van is blue (Blue Jean in Ford color lingo). We’ve named it Mavi. And since her license plate starts with ELW, her full name is Mavi Elwood.

Posted in Gear, Preparation | Leave a comment

We Have A Transit 350

Yup, I know. I’ve been remiss in my capacity as chronicler of this van build. You’ve been waiting (some more patiently than others), but I’ve been sitting on my hands. And while I knew that neither Elizabeth nor I had posted in a long time, I didn’t realize that the last post was before we got the van.

We did.

It’s here.

Big and beautiful.

Passenger Side

Driver Side

We picked it up on Tuesday 20 July 2021. First thing off the lot, we took it to a truck scale. With a reasonably full gas tank and two occupants, it tips the scales at 6320 pounds. We’ll see what happens to that number as the build progresses.

The pictures above are taken somewhat after that. I had already built and installed the roof rack, as you can see. The rack itself is made of a product called 8020 aluminum extrusion. It’s made by a company called 8020, as well as a few others. I discovered it early this year, while learning how to build this beast. The 8020.net website bills their product as an Industrial-Strength Erector Set. The funny thing is, that’s exactly what I had called it, once I realized what could be done with it, but before I’d visited the site.

Besides the roof rack, the plan is to build all of the van’s interior components (galley, shower, bed/table frame, and so on) as separate modules, framed in 8020, and therefore moveable, removable, and modifiable, with considerably less effort than if they were built of wood or some other material. I could spend many pages discussing the properties of 8020, what can be done with it, and how to work with it. But that’s not the point of this blog. If it interests you, I encourage you to look at 8020.net. It’s really cool stuff, and there’s lots of information there.

Posted in Gear, Preparation, Research | Leave a comment

Progress Nonetheless

If you’ve been paying attention, you’ll recall that when we ordered our van back in February, we were told it would be delivered during the week of May 24. And if you’re awake, you’ll note that that week has come and gone. In lieu of a shiny new van awaiting camperization, we have a new target date: the week of June 25. That’s next week. Fingers are crossed.

In the mean time, we’re stilling pounding away on this project. Do you know what this is?

To give a little context, the room is our dining room, from which most of the furniture has been relocated. We’ve taped off the floor to represent the interior of the van, and are laying out mock-ups of the major items that will be in it. This particular rectangle we’ve constructed out of old cardboard and 1×2 lumber as a representation of our bathroom/shower. It occupies a 2′ by 3′ space on the floor, and gives us a feel for the eventual proportions of the finished room. That cardboard box in its corner represents the composting toilet, which we’ll keep in the shower. There will be a thin scrolling door, closing the shower from the rest of the van, that squeegees off all the excess moisture as it’s opened.

And this is a model of the frame in which our refrigerator will reside.

The frame is made of old scrap lumber we happened to have in the basement. It’s just about the height of the interior of the van (or what it will be when the insulated floor and ceiling are installed). The cardboard panel is the refrigerator door within the frame, with marker lines separating the freezer above from the fridge below. We can move the cardboard up and down to find the right height for us, with storage both above and below it.

We also have various 3D cardboard rectangles to represent the water heater, propane locker, batteries, and whatnot. As we construct the larger items, we’ll populate them with the smaller ones, to get a feel for how space will be used.

Which brings us to the latest addition:

We ran out of long scrap wood, so I bought some 2 x 4s, ripped them down to 2 x 2s, and started screwing them together. This structure, in its eventual incarnation, will be our bed, dining area, and storage compartments, with room for dog crate(s). The closed rectangles will have wooden tops. When we want the bed, we’ll fill the open rectangle with slats, and cover the whole thing with a queen-size memory-foam mattress. In the dining configuration, the mattress will fold up into cushions, the slats will come out to let our feet dangle in the open area, and that box in the open area will be a raised floor on which to rest our feet and mount the support for our table top. With, of course, more storage below.

The first thing I noticed when I put it all together is that it’s too tall. In planning, I’d wanted the mattress to be at about the level of the van’s widest point, or about 31 inches off the floor. We plan on sleeping east-west (side-to-side within the van), and want our bed to be as long as possible. There’s even a Post-It note on the refrigerator door, above, with the right measurements. But for some reason, when cutting the lumber, I kept thinking of the desired height as 36 inches. Nor did I account for the thickness of the mattress. Sigh. That’s why we’re mocking everything up in cardboard and wood before committing to the eventual materials: to make our mistakes while it’s still cheap.

So today’s project is to lop about six inches off all those uprights, and see what we get. Stay tuned.

Posted in Gear, Preparation, Research | Leave a comment

Division of Labor

So far, the van project has been pretty technical. You may know that I have a limited understanding of things like heating systems and plumbing, due perhaps to the fact that when it’s explained to me, my mind wanders off somewhere, so by the end of the explanation I discover that my knowledge has advanced not at all. Maybe you can sympathize.

So I’ve been focusing my efforts on the design of the living space. I have strong opinions, which makes it easy. The first step is establishing priorities:

  1. The image that really sold me on this whole van project was the view of the ocean from a cozy bed or dining booth at the back of a van, rear doors wide open, delicate curtains billowing in the salt breeze, sun shining on the distant water. Therefore, in our build, the bed has to be in the back, and so does the table and benches. Therefore, the bed has to convert to a living/dining area.
  2. I am not (excuse the TMI) pooping in a bucket; nor am I leaving the van when I wake up in the middle of the night. Also, there’s a limit on togetherness. Therefore, our van must have a private bathroom inside.
  3. Speaking of limiting togetherness: one vanlife video I watched featured a young couple who exclaimed, “The best part of living in our van is that we get to be together all day, every day!” [Pausing so that idea can sink in a little.] It’s not even worth making a comment starting “When you’ve been married as long as we have…” because at no point in my entire life have I ever wanted to be with ANYONE all day, every day. And Henry’s the same way. Therefore, the van has to have a way for us to be apart from each other—not including the bathroom.
  4. I like cooking and we both like eating. Therefore, a way to prepare real food is important. Our kitchen here in our old 1900 four-square house is tiny, so it’s not going to be difficult to work in a constrained space. I’m currently testing out alternatives for cooking appliances and will report on that later.
  5. There must be room for dogs. If you know us I don’t think I need to explain further.

Although we live in a big house chock full of stuff, there isn’t really a need for a lot of storage. We did pretty well in our little van on our Central America adventure. In fact, I found it refreshing to have limited wardrobe choices every day—so easy to get dressed in the morning! Of course that’s only feasible when the weather is entirely predictable, which it isn’t, ever, here in Michigan.

I’ll post a plan of the layout once I get it translated from Post-It notes to a digital file.

Posted in Uncategorized | Tagged , , | Leave a comment

Stealth

Amongst those building, traveling in, or living full-time in camper vans, there is the notion of stealth: disguising the fact that the vehicle in question is a portable domicile, and making it appear as just another commercial or passenger van. There are a couple of reasons for this. Some folk worry that if and when they’re parked for the night—but not in a recognized campground—an obvious camper-van will attract attention from the authorities. They don’t want to be roused at 3:47 in the morning and told they can’t park there overnight. Others are concerned about visits from ne’er-do-wells. They figure that if a van looks like it might contain valuable goodies—cameras, electronics, maybe even cash—that it will be a target too tempting to pass up. We worried about this a little in Central America, and while we weren’t sleeping in the van, we tried to park it in well-traveled areas, while concealing anything that looked valuable.

The techniques for stealth range from the obvious to the subtle. A large roof-rack, holding a big utility box, an air conditioner, angled solar panels, and a ladder up the side is pretty much a give-away. Louvered side panels, providing ventilation for refrigerators, heaters, and hot-water heaters are also clues. Provisions for utility connections, electricity, water, and sewage, can tip off the observant. Big aftermarket wheels and tires are often indicators. Any of these items, though desired, may be passed by in the interests of keeping a low profile. On the Ford Transit Forum, at least one contributor has stated that while they’d really like to have a big awning attached to the side of their van, the perceived need for stealth prevents them from installing one.

This topic provokes a large body of reactions on the forum site. Most commenters seem to think that some degree of stealth is desirable. But they vary widely on the appropriate degree. And everybody has great ideas about how to achieve it. Just ask ‘em. There are plenty of stories about when more stealth would (or might) have helped. Stories involving both the local authorities and the local bad guys, wherever that locale may be. But it’s all anecdotal; nobody has any hard information about the efficacy of any particular measure. Not too surprising, as the great majority of people in this group have but a single data point, their own van. OK, some of the veterans have built two or three (or more), but that’s still nowhere near a meaningful sample size.

And yeah, I get it, nobody is about to do a large-scale, rigorous, double-blind study on the effects of stealth design in camper vans. Still, it’s frustrating to try and get any meaningful information on the topic.

While most stealth efforts involve reducing the attention the van receives, there are also those that attempt misdirection. Commercial plates will often help, if only subtly. A roof-rack populated with paint-spattered ladders, and paint drips down the doors and walls would also be effective (I presume), but I haven’t seen a camper that tried it. As far as I know. One idea that keeps coming up in various incarnations is lettering. Simply labeling the van as part of a commercial enterprise could go a long way to concealing its actual purpose.

A vehicle used in commerce, with a gross vehicle weight (GVWR) of more than 10,000 pounds is required (I think) to be registered with the US Department of Transportation, and display its registration number prominently. I’ve seen trucks that take the preventive measure of sporting a label like:

That certainly looks official, and suggests a commercial vehicle, even if most folk don’t quite understand its significance. But why stop there? Why not put up a sign on the driver’s and passenger’s doors, proclaiming this van to be working for a living, and on duty right now. Of course, similar rules apply, in that we don’t want the name to suggest that there are valuable supplies or equipment inside. We’ve come up with some possibilities: Midtown Garden Supply, Interstate Medical Waste Disposal, Electrodyne Corporation, VelSik Appliance Repair, and so on.

Maybe something simpler.

That’ll stop ‘em for sure.

Posted in Preparation, Research | Leave a comment

#vanlife: It’s a Thing Now

Henry and I both like to think of ourselves as all original and creative and cool. Surprisingly, it turns out we’re not. When we told the cargo van specialist at the Ford dealership that we wanted a van to convert to a camper, he muttered, “Oh, geez, another one!” and barely refrained from rolling his eyes.

Okay, so apparently we’re not the only ones who developed an itch to take to the road during this past year. And now we learn there are whole groups of people who have been doing this all along.

You’ve probably heard about the film Nomadland, especially after it won a big pile of well-deserved Oscars. Based on the book by Jessica Bruder (which isn’t nearly as good as the movie), it’s about a subculture of contemporary nomads who have essentially been squeezed out of traditional 9-5 life or who have left that by choice. Such folks live in kitted-out, jerry-rigged vehicles, whether it’s a van, a big RV or trailer, or even a tiny Prius. They move from temporary job to gig work to make ends meet, working as campground hosts in the summer, Amazon warehouse runners in peak holiday shopping season, and at other low-status seasonal jobs that barely seem to pay for the gasoline they need to keep traveling. The movie Nomadland had, I thought, an ultimate feeling of optimism and freedom. The freedom has a cost, though—such a life may be interesting, but it’s also difficult and uncomfortable.

And then there’s the stereotypical population of sock-and-sandal-clad geezers who travel in giant RVs fitted with all the comforts of home, including recliners, large-screen tvs, and washing machines. Our recent visit to a Camping World store, which serves the RV community, revealed an entire aisle of various satellite dishes, extra large capacity folding camp chairs, and light-up plastic palm trees, which I imagine lend a tropical flair to your campsite whatever your latitude. (The American flag flying in front of the store was as big as the footprint of my house. And I’m only exaggerating a little.) In reality, RVers come in all types; certainly the senior crowd, but also whole young families and single hipsters. But the stereotype persists.

And speaking of hipsters, there’s the whole #vanlife thing. Young folks, singles and couples, are building out vans and creating masterpieces of self-constructed mobile living spaces. Many of them have Scandinavian-like clean design. These are the minimalists; people who only want to own one frying pan and one towel and don’t accessorize. They also own a super high-end technology because they make their living working remotely or as social media creators and influencers. The man-bun is a popular hairstyle among this crowd. There’s a recent article in the NYTimes about #vanlife that has some good exemplars of the breed (no man-buns, though).

Some people go in for “skoolies,” school buses converted into tiny homes on wheels; generally more house-like than vans (more space!) and more in the spirit of upcycling than RVs. Although they vary widely in style, these can be more cabin-like than many vans, with ship-lap walls and even tiny wood stoves. I’ve also seen rebuilt ambulances, bread delivery trucks, and prison trucks.

But there are also people like ourselves, retired or nearly, who build a van for the fun of the build and the travel that follows. We’re definitely not going to work for Amazon’s holiday rush, our van will have a proper toilet and shower but no satellite dish, and Henry’s not going to grow a man-bun. We like our belongings too much to want to live in a van permanently. But we’re having a great time designing the van and thinking about all the National Parks we’ll visit once it’s ready to go.

Posted in Preparation, Research | Tagged | Leave a comment

Packing Heat

My previous two posts may give the impression that I’m down on propane. Or would prefer to keep it out of the van. And it’s true that many builders feel exactly that way. One of them is George of The Humble Road. And the Transit Forum has plenty of builders who would never allow propane to besmirch their otherwise beautiful van.

I’m not one of them. First and foremost, both Elizabeth and I greatly prefer a gas stove to an electric one. It’s more responsive, easier to see what going on, and just easier to cook on. I also want to use a propane furnace to heat the interior of the van. The alternatives are electricity (fine, if you have a kajillion-amp-hour battery) and van fuel, either gasoline or diesel. The Far Out Ride people have both a gasoline-powered furnace made by Webasto, and a propane furnace that they installed when it looked like the Webasto was having serious problems. They eventually resolved the problems, and now prefer the gasoline burner. But when I read about what they went through to get there, and how finicky the Webasto furnace still is—even when dialed in properly—the simplicity of a propane furnace is very attractive.

George also uses Webasto furnaces (or similar units from Espar), but I think that’s mostly because he’s down on propane, at least in a van. In other builds, the field is divided and scattered. Some like furnaces powered by vehicle fuel, some like propane, some stay in southern California and don’t think about heat at all.

The Far Out Ride’s propane furnace is made by Propex, and it looks really good. They like it just fine, just prefer the Webasto. Of course, just like the refrigerator we rejected, and the water heater we’re still considering, a propane furnace needs fresh air to burn and a place to send its exhaust. Unlike those other two appliances, however, the Propex heater needs only small holes in the van, two 1½-inch circles cut through the floor, rather than big rectangles in the walls and ceiling. Definitely more attractive.

Not only that, but in collecting images for this post, I discovered that Propex has a new and improved model, the HS2800. More heat, more efficiency, more quiet. I think we have a winner.

In addition, for those mornings when it’s just a little too chilly, but not really cold enough to fire up the furnace, we’ll have a heating element in the floor. Toasty toes. When Elizabeth first suggested it, I did some research and found there are plenty of 12VDC, under-floor heating pads available. They draw not much current, and come in many different sizes and layouts. I haven’t gone back to pin down the right one, mainly because there’s no point in heating a section of the floor hidden under a cabinet (or the refrigerator!), and we have yet to settle on a precise layout. Once we do, we’ll know the size and shape of the heating element we need. And since the floor is one of the first parts of the van to build, you’ll hear all about it.

Posted in Preparation, Research | Leave a comment

Heating Up

Now that the refrigerator is out of the way (in Tina’s garage), the next item to consider is the hot-water heater. We’ll need one. My family’s travel trailer had one, and I sort of remember using hot water in the trailer, but not very clearly. We also had a shower, which I think we never used, except for storage. We generally spent nights parked in campgrounds, and they all had bath houses. Their facilities and cleanliness varied widely, but they all had much more water—and hot water—than we were able to carry in the trailer. So the shower mostly collected dust.

Our current plan is to be more self-sufficient and self-contained than we were in the trailer. One of the must-have items is a usable shower. Hence a hot-water heater. Isabelle and Antoine of The Far Out Ride have a shower, powered by a compact little propane-fired, tankless water heater. It’s really pretty nice. I figured we could do similarly. But then my experience with planning for a propane-powered refrigerator, made me ponder it a bit more. And it occurred to me, I&A’s shower is completely outdoors. The shower head, hose, and water heater are all mounted on the inside of the back door, along with a fabric three-sided enclosure. To take a shower, they open the door wide and set up the curtain. The shower and heater are open to the air, so they don’t have to even consider where the heater gets oxygen for the propane, nor where it vents its exhaust. And the heater feeds only the shower, as the sink in the galley has only cold water.

This is very convenient for Isabelle and Antoine, but a little too rustic for our tastes. By the pictures on their site, they’re 20-30 years younger than we are. We want an indoor shower, warm and cozy, away from wind and bugs. Many other builds have one, it’s just a matter of allocating the space and building it.

The tankless aspect of their system is still attractive, as the supply of hot water is limited only by the size of the fresh-water tank. And there’s no shortage of tankless, propane-fired water heaters available. But they all have the same problem as the propane refrigerator: if it’s to be inside the van, then getting air to and from the flame involves cutting large holes. Hmm.

George from The Humble Road takes a different approach. The water heaters he uses were developed for the marine industry. They have small tanks, four to six gallons, and run on 120VAC. In addition, they splice into the vehicle’s engine-cooling system, using a couple of heat-exchangers to convert what would otherwise be waste heat into usable hot water. Depending on how much you drive and how long your showers are, you could have sufficient hot water without drawing a watt from your electrical system. And no propane, no van holes.

These water heaters are marketed by Isotherm/Isotemp, and made by Indel Marine, all of which are owned by the German manufacturer Webasto, which has a large presence in the Detroit-area automotive industry. They look very well-designed and well-made, and George thinks highly of them. I’ve yet to make up my mind, but I’m considering.

Posted in Preparation, Research | Leave a comment